Monday, December 23, 2013

Chevron Snacks

It is that time of year again, Sophia's birthday. I love making something fun for the kids that come to her birthday. This year, with her starting school, I thought that some reusable snack bags, filled with snacks, would be great for her friends.
I bought a Riley Blake Chevron Fat Quarter Bundle and tried to decide how best to use the fabric. With an 18" x 22" fat quarter I decided that a snack bag size of 6" x 6" square, would allow for the least amount of fabric waste. I have had some pul fabric at home just waiting to be used, so I cut it down to 6" x 6" for the inside of the snack bag to make it easy to wipe out and clean. The last thing I needed was some velcro to close them. Apparently I bought the world's strongest Velcro, so I am hoping that the 5 and 6 year olds at the party can actually open them. I figure with enough snacks inside they will make the effort to open them.
with a fruit by the foot, a kinder egg and a pack of gum, I am sure they will make the effort! The bags were easy enough to make and the colours match Sophia's theme of Monster High and still ok for the boys that come to the party.
I guess I didn't really think of the teacher on Monday with all the Velcro bags being torn open, whoops!

Monday, December 16, 2013

A Quilt for a Cause

When Layla's school mentioned that they would be doing a silent auction I immediately decided that I wanted to donate a quilt. I did a quick search and came across the Sea Glass pattern from Talk of the Town. The quilt she has on the pattern is gorgeous and I wanted to replicate the colour choices for my own quilt.
Her pattern called for a 40" quilt but I decided to go with a 60" to lengthen the amount of time it could be used, instead of just as a baby quilt. Isn't this quilt absolutely stunning. I already have ideas for the next one I want to make, perhaps for Sophia's school.
I love starting out with a pattern and finding the perfect fabric to make it come to life. I truly believe these colours make the quilt as beautiful as it is.

Koi for a Boy

It has been a very long time since I have posted, but I see the blog continues to by busy. I have recently been feeling very crafty and have been asked to make some baby blankets, for some very new and almost here baby boys. As you may know I have two girls, so choosing fabric for baby boys is always challenging for me but I came across a couple of different fabric lines that I wanted to try out. The first is the Eiko Collection by Jay Cyn for Birch Fabrics. I have not used organic fabric in the past but WOW what a difference. The quilt was made using Organic Eikos Pond in Pool and Organic Flower Dots in Pool on the front and Mod Basics2 Skinny Chev in Orange for the back (sent the quilt away too quick and forgot to get a picture of the back).
Organic cotton feels so much more natural. I also used the new Warm & Plush 100% Natural Cotton batting, which quilted beautifully.

Thursday, January 26, 2012

Pocket Dresses

I knew that I would make this pocket quilt for Sophia's bedroom as soon as I saw it. The pattern is called "Dressed to Impress" and it is from Quilts and MoreFall 2010. I used Dena Designs "Kumari Garden" fabric line, because it would match the pink in Sophia's bedroom. 
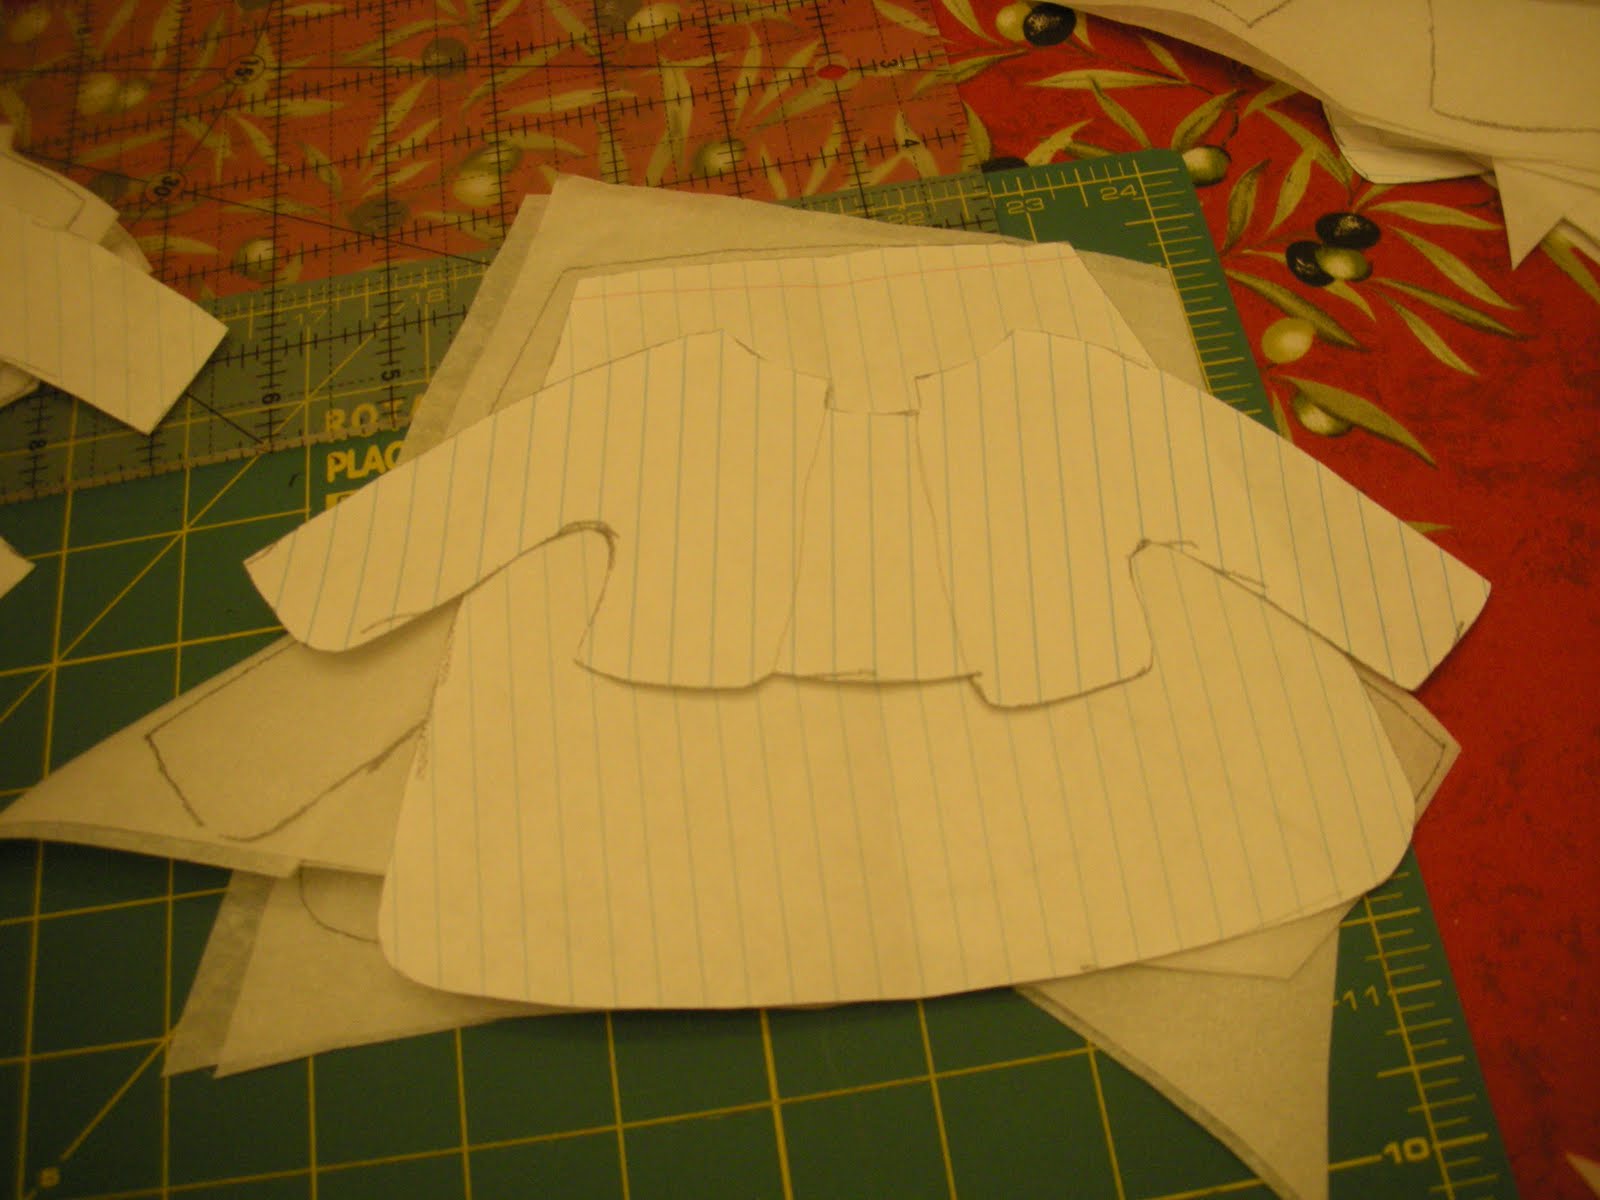
The first step of the project was to make the dress applique for the front of the pockets. I traced out 4 different dress patterns and created a template.
If you haven't made your own applique before it is very easy to do. You need "Steam a Seam" Double Stick Fusible Web. You need to trace your design on to the web and fuse it to your fabric. *Make sure you trace your design on the correct side of the fusible web, the side that is less easy to pull away from the web.
After you have fused the web, to the wrong side of your fabric, you are going to cut it out. You will be left with your pattern ready to be ironed on to your project.
You could end there and just iron the template on, I tend to use an embroidery stitch around each piece to resemble an applique. You can see the pink stitch around the dress design on each pocket.
I took a couple other photos of the progress of the quilt. If you decide to make this pattern keep in mind that it is as time intensive as making a quilt, and it takes more fabric. Each pocket is lined and there is batting between the fabric on the front of the pocket, and a full sheet of batting for the back of the quilt. Sewing the pockets together requires a heavy-duty sewing machine that can take the thickness.
I absolutely love this pocket quilt! And by creating my own dress template for the pockets it's even more unique.
I had not finished hand stitching the binding when I took this photo, I need to take a photo of it hanging in Sophia's room. I created tabs on the back so it could hang on a curtain rod. I'll include photos of that with the finished product. It might give some of you an idea of how to turn a quilt into a wall hanging. I finally took some final photos.
And the tabs on the back were a suggestion of a friend. Thanks Anne! I stitched a piece of batting in between 2 pieces of fabric (scrap leftover from the back) and I sewed one end into the binding at the top. I then looped it under and hand stitched it into a loop.
I think it looks absolutely adorable in Sophia's room. Definitely a "hint of pink" in this bedroom.

Monday, November 7, 2011

Robot Party

It's finished! If there is anything positive to say about the time change it's that I feel like I've had an extra hour a day on the weekend to get things completed, including this quilt. And a few people at work can attest to the fact that this quilt was finished yesterday, since I had to bring it in and show it to them today. I took the photos yesterday but it was a little late to stay up and post the finished product, completed ahead of time! I must say that every time I finish a quilt and "just" have the binding to hand sew I drastically underestimate the time that it will take me to finish, just want to thank the inventor of the sewing machine for making the rest of the project such a delight. Now that the quilt is completed I can stand back and look at the quilt and I'm not sure if I am more in love with the front of the quilt...
or the back...
I definitely have to rate this "Toddle Time" quilt pattern as very good, I found that I didn't need quite as much fabric as the pattern suggested, but I also like to lay everything out ahead of time and make sure I reduce waste, if it wasn't for the additional fabric I had to buy this would definitely be an excellent rating. The instructions were very easy to read and understand and with the strip piecing option with 2 of the 3 blocks it took little time to assemble. The finished size is amazing, it can be doubled over to fit on a crib/toddler bed, thrown on the floor for tummy time, and then placed on a twin sized bed for an older child. This pattern and fabric has been a hit with moms with boys (I'm lacking in the boy department over here) and I really hope a new mom will appreciate that the robots will be cute for a baby and still practical for an older child. With the due date fast approaching I can hand off the finished quilt, but I still have fabric left over to make a fantastic throw pillow with his name on it, and really isn't that what every baby wants, a matching quilt and throw pillow for their crib?!?

Sunday, October 30, 2011

Robot Block Party - Day 5

Well, I didn't think it could be done but I have the front of the quilt complete! I received the fabric last Monday and 7 days later I am ready to start assembling the quilt. The great thing about this pattern is that if I was in a real rush I could have sewn it faster, but I took my time and worked on one piece a time. I'm hoping to get out and purchase the batting tomorrow, and depending how late the trick or treaters come I might get a chance to start assembling the quilt. At this rate I am hoping to be finished by this time next week.

Friday, October 28, 2011

Robot Blocking - Day 4

I'm not sure if today is Day 4 or 5 but since I didn't sew yesterday I'm going with 4. So today I finished sewing all of the blocks for the Robot quilt. There are 14 blocks in each of the 3 designs, and with the addition of the top and bottom scrap pieces I should have a 48x64 quilt when I piece it all together. It may be the fact that I have not done much sewing recently that I have energy to work on the quilt OR the fact that this quilt is extremely easy to put together but after 4 days I did not imagine that I could have all of the blocks assembled ready to piece the quilt top this weekend. I'm already getting excited about how great it is going to look. And with the extra fabric I have left over I am planning on making a personalized pillow with the new baby's name, I will have to wait until after the birth to finish that project. But I have to finish the quilt first, one project at a time.