Thursday, January 26, 2012
Pocket Dresses
I knew that I would make this pocket quilt for Sophia's bedroom as soon as I saw it. The pattern is called "Dressed to Impress" and it is from Quilts and MoreFall 2010. I used Dena Designs "Kumari Garden" fabric line, because it would match the pink in Sophia's bedroom.
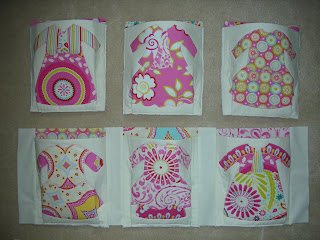
The first step of the project was to make the dress applique for the front of the pockets. I traced out 4 different dress patterns and created a template.
If you haven't made your own applique before it is very easy to do. You need "Steam a Seam" Double Stick Fusible Web. You need to trace your design on to the web and fuse it to your fabric. *Make sure you trace your design on the correct side of the fusible web, the side that is less easy to pull away from the web.
After you have fused the web, to the wrong side of your fabric, you are going to cut it out. You will be left with your pattern ready to be ironed on to your project.
You could end there and just iron the template on, I tend to use an embroidery stitch around each piece to resemble an applique. You can see the pink stitch around the dress design on each pocket.
I took a couple other photos of the progress of the quilt. If you decide to make this pattern keep in mind that it is as time intensive as making a quilt, and it takes more fabric. Each pocket is lined and there is batting between the fabric on the front of the pocket, and a full sheet of batting for the back of the quilt. Sewing the pockets together requires a heavy-duty sewing machine that can take the thickness.
I absolutely love this pocket quilt! And by creating my own dress template for the pockets it's even more unique.
I had not finished hand stitching the binding when I took this photo, I need to take a photo of it hanging in Sophia's room. I created tabs on the back so it could hang on a curtain rod. I'll include photos of that with the finished product. It might give some of you an idea of how to turn a quilt into a wall hanging.
I finally took some final photos.
And the tabs on the back were a suggestion of a friend. Thanks Anne! I stitched a piece of batting in between 2 pieces of fabric (scrap leftover from the back) and I sewed one end into the binding at the top. I then looped it under and hand stitched it into a loop.
I think it looks absolutely adorable in Sophia's room. Definitely a "hint of pink" in this bedroom.
Subscribe to:
Post Comments (Atom)


No comments:
Post a Comment