

Tuesday, October 25, 2011
Cut It Out Robots - Day 2

Monday, October 24, 2011
Robots - Day 1
When I got home at lunch today and saw my parcel tag on the door I knew that my fabric has arrived.
A couple weeks ago a girlfriend asked me to make a quilt for her soon to be arriving nephew. It seems like I've been buying a lot of boy fabric recently so I thought I would switch things up a little and not use flannel. I searched online a week and a half ago and found this adorable cotton fabric from Robert Kaufman, Robot Factory by Caleb Gray. I wanted to choose a fabric that would take a long time for a boy to outgrow; actually Steve wants a blanket out of this fabric so I know it will last a long time!
 I picked up my fabric on the way home today (even before I picked up the girls) and was excited to see that it is as adorable as I thought it would be. I chose to make the "Toddle Time" Quilt, by Carlene Westberg.
 So like I was saying today is Day 1 of the project. I prewashed all of the fabric and I am hoping to have it all dry and ironed tonight. I'm not sure how long the quilt will take me but I'm planning on documenting my progress.
Wish me luck!
So like I was saying today is Day 1 of the project. I prewashed all of the fabric and I am hoping to have it all dry and ironed tonight. I'm not sure how long the quilt will take me but I'm planning on documenting my progress.
Wish me luck!


Sunday, June 26, 2011
Dress Up Craft Creation

While I remain optimistic that the weather during my vacation this week will be fantastic I have been trying to think of activities to do with the girls at home if we are stuck inside.
Sophia has always loved fashion and dressing up dolls and I thought that the "Dress Up Dolls" die cut from Sizzix would be a perfect activity around the house.
Sophia loves cutting and pasting and this activity would definitely allow her to paste and create MANY different possible outfits for the dolls. The options for hair, clothes and shoes are almost endless.
Steve brought home some craft boxes a while ago and I have found a use for a couple of them with all of the patterns that I cut out. I have been meaning to cut these out for a while now, and with the house to myself this weekend it allowed me the time to do it.


I will have to update my post with the outfits that Sophia creates.
Friday, June 24, 2011
Summer Solstice = Summer Hats
 Nothing says summer like children playing outside lathered in sunscreen and wearing a great hat. I have been looking for an excuse to make more hats for the girls and the perfect time to do that is the beginning of summer. Sophia has been getting compliments at school with her "fgd" hat and I thought Layla might need a homemade hat of her own. When I asked her what colour she wanted I was a little surprised when she asked for green. But, I listened to her wishes and, since the hats are reversible, Layla can wear green whenever she likes.
I absolutely love the orange fabric that I found and the animals matched it perfectly. Sophia has already been asking for a doll blanket to be made with the animal fabric. The cherry fabric isn't as kid oriented but with the green polka dot lining I'm sure it will be a favorite.
Unfortunately my beautiful models are up at the cottage with Daddy, Grandma and Papa this weekend so I couldn't completely show off how fantastic they turned out but I'm sure Layla will reach for them with a "mine" when they return on Sunday.
Sunday, May 15, 2011
A Place for All Her Stuff

For my first trip to Florida this year I bought Sophia an inexpensive vinyl pencil case to hold her crayons and some new stamps that I bought her. By the end of the trip Sophia had crammed everything that was important to her into her pencil case. There was a watch, crayons, stamps, bracelets, chapstick...and I could go on, all together in this pencil case that was not very large. Sophia also carried around a little colouring book with her and had to have this book and her pencil case everywhere that we went.
For my second trip to Florida I decided to make Sophia something that she could carry her colouring books in and a pencil case that could be a catch-all for all the little treasures she came upon during our trip. I let Sophia choose the fabric that she wanted out of my constantly growing stash. I still wasn't exactly sure what I was going to make for her but I started anyway. Sophia asked for a tinkerbell pencil case, an embroidery file that I already had, so I started with the pencil case.

And then she decided on a butterfly book holder. I wanted something that she could put on her lap and was strong enough for her to colour on, I lined the back of the colouring/activity book holder with fairly rigid interfacing. I added mesh at the front of the book holder so that she can slide her pencil case inside and we can stay fairly organized, rushing around at the airport and on the plane.
I lined both the book part of the carrying case and the pencil case with PUL fabric, for all those marker and stamp accidents so they wouldn't soak through the beautiful fabric and added a zipper to keep everything from falling out.


Sophia uses her book/pencil case regularly and she can slip in her books and zip it closed by herself, and anyone that knows Sophia already knows that regardless of whether she can or can't do something she refuses all offers of assistance, so the more child friendly my projects are the better for all of us.
Tuesday, May 10, 2011
Groovy Wardrobe *UPDATED TO INCLUDE PATTERNS*

On one of my shopping adventures last summer I was hit by a stroke of creativity...I came across a couple of Groovy Girl dolls and realized that this might be my solution to Sophia's constant wardrobe changes. I thought if she could change a doll's clothing she might stay in the same outfit for an entire day! Wishful thinking perhaps, but when I looked at the clothes that come with the dolls I realized the potential for me to make her an entire wardrobe for her doll. Time sometimes gets the best of me and I didn't end up making clothes for Sophia's doll for her birthday, however last week was my niece's birthday and Sophia's doll clothes fit her doll perfectly so a birthday gift idea was created. I spent a while searching through my fabric for the perfect doll clothes fabric and I am so thrilled by the outcome.
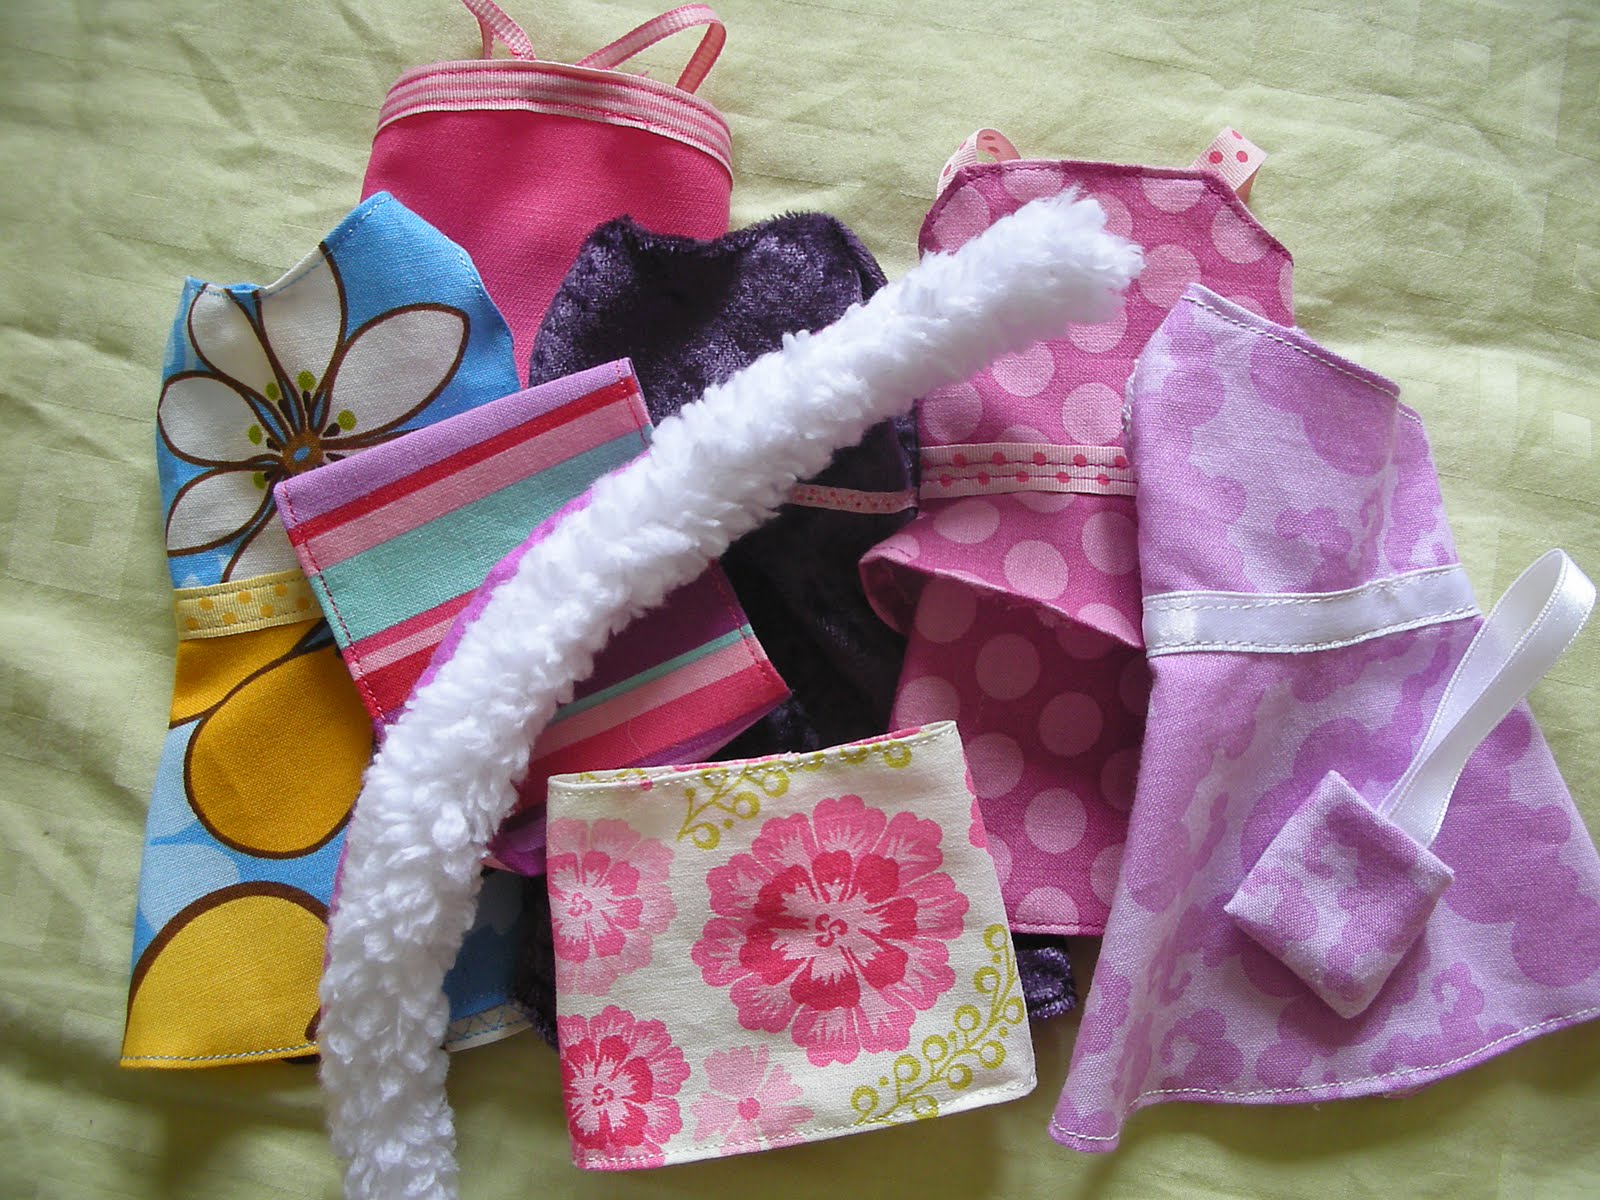
3 dresses, 3 skirts, 2 shirts, a purse and a boa (every doll needs to accessorize). As you can see I bought a couple of dolls to give Sophia enough clothes for her doll, but that same clothing gave me the pattern pieces to create the outfits that they are wearing in this picture. A great looking bunch of girls if you ask me.
The Groovy Girl clothes are very basic in terms of sewing technique, since the clothes do not have to go in the washing machine a simple overcast seam around the pattern piece is all that is required to prevent fraying, I simply folded up this overcast stitching and did my seam for the outfit. Ribbon and velcro are necessities for these clothes, and I could see sewing on some buttons or other notions to really individualize each piece. Perhaps even a little embroidery would be needed on special pieces.
If anyone needs a new "little" outfit I would be happy to duplicate these Groovy Girl clothes patterns, these outfits were a lot of fun to create. Wow, I can't believe the response to this posting. I guess I am not the only one that wanted to make clothes for groovy girls. I have created a couple of patterns and posted them below (the patterns did not scan perfectly but you can still see the outline) so people can download them, instead of me keeping up with emails For each design there is a solid line, finished size and a 1/4" dotted line around, for cutting. You will need basic sewing knowledge to make these and you might have to play around with piecing pieces together, to ensure perfect fit. However, none of them are that difficult and with enough different pieces of scrap fabric your groovy girl could have completely different looks using only one pattern. Play around with embellishments as well, nothing adds to an outfit like some sparkle or ribbon. (The following patterns need to be printed on 8 1/2" x 11" paper.) Page 1 - Skirt and Top


Monday, February 7, 2011
Girls Gone Florida!

The girls and I just got back from a fantastic week in Florida. My parents, otherwise known as Oma and Opa picked us up at the airport and we enjoyed a fun-filled week at the....
POOL....

BEACH....

RIDING BIKES....

CLEANING GOLF CARTS....

EATING....

and after all that
SLEEPING....

Thank you Oma and Opa!
oh and there is nothing in this blog about fabric or sewing, because the only store I didn't make it to was the FABRIC STORE!
Luckily we're heading back in a few weeks.
Subscribe to:
Posts (Atom)